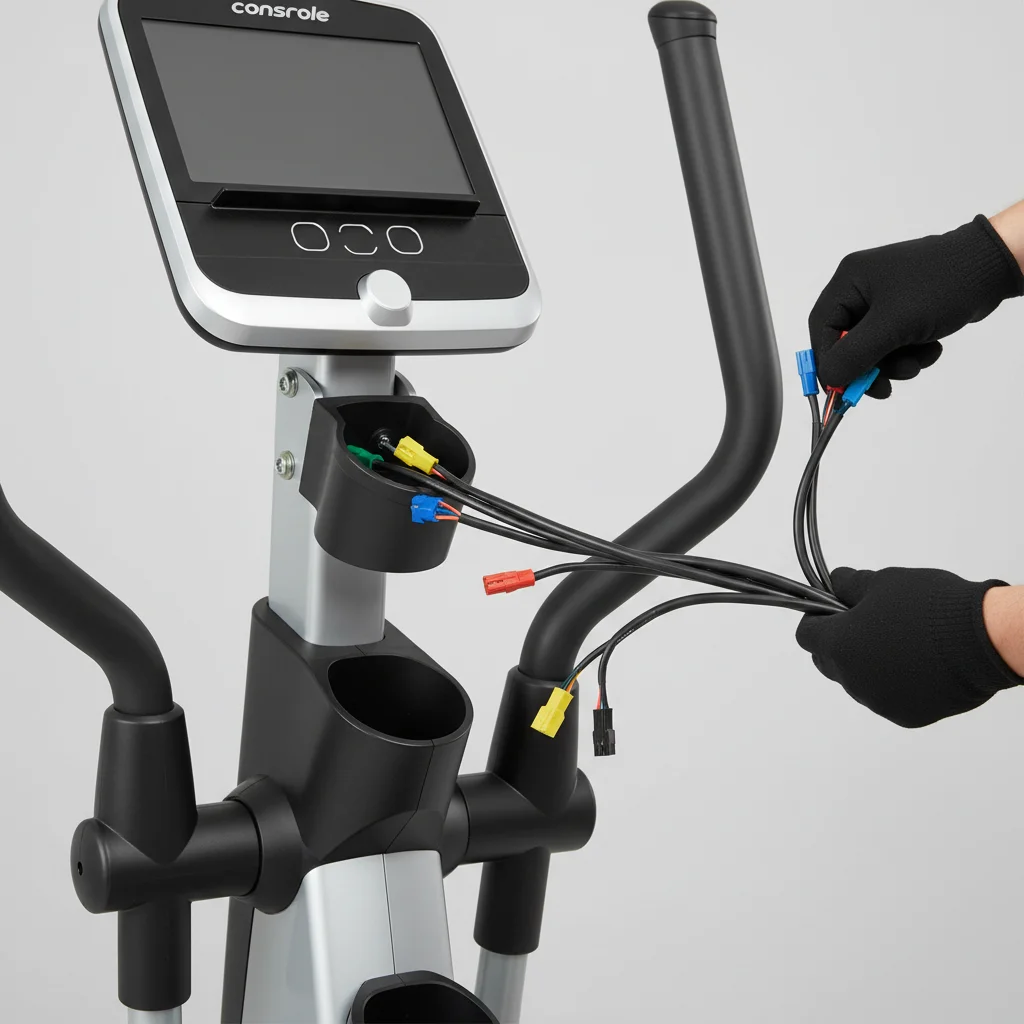
Connecting the console wires during elliptical trainer assembly typically involves 3 to 5 main connections, depending on the model and its features. These connections are crucial for the display to function correctly, showing your workout data like speed, distance, and heart rate. Most modern ellipticals use a modular design, making the process straightforward with clearly labeled cables.
Understanding Elliptical Console Wire Types
Elliptical trainers generally feature several types of wires that connect to the console. The most common include the main power cable, which supplies electricity to the console and sometimes the resistance motor; sensor cables for speed and distance tracking, often connected to the flywheel or pedal arms; and heart rate monitor cables, which link to handgrip sensors or a wireless receiver. Some advanced models may also have cables for incline control or integrated speakers. For browse all home fitness articles on this site.
Step-by-Step Console Wire Connection Guide
Before you begin, ensure your elliptical’s main frame is stable and all other structural components are securely fastened. Locate the main wire harness extending from the upright post. This is usually a thick bundle of wires with various connectors. Match each connector from the console to its corresponding port on the main harness. Pay close attention to color-coding and unique connector shapes to ensure a proper fit. Gently push each connector until it clicks into place, indicating a secure connection. Avoid forcing any connectors, as this can damage the pins.
- Identify the main power connector (often a larger, multi-pin plug).
- Connect the speed/distance sensor wires (usually thinner, often white or black).
- Attach the heart rate monitor cables (typically small, two-pin connectors).
- Secure any additional feature wires, such as incline or fan controls.
- Tuck excess wiring neatly into the upright post or designated channels.
Troubleshooting Common Connection Issues
|
Our Picks for the Best Elliptical Trainer in 2026
As an Amazon Associate I earn from qualifying purchases.
|
||
| Num | Product | Action |
|---|---|---|
| 1 | Under Desk Elliptical Machine, Electric Elliptical Leg Exerciser While Sitting for Seniors with Upgraded 15 Speeds & 12 Auto Mode, Forward & Reverse Direction, Quiet Portable Seated Pedal Exerciser |

|
| 2 | Under Desk Elliptical Machine, Upgraded 6 Adjustable Resistance &15 Speeds Electric Elliptical Leg Exerciser while Sitting for Seniors with Forward & Reverse Direction, Touch Screen and Remote Control |
|
| 3 | Cubii JR1, Under Desk Elliptical, Under Desk Bike Pedal Exerciser, Seated Elliptical, Work from Home Fitness, Mini Elliptical Machines for Home Use, Cubii Exerciser for Seniors, Desk Exercise |
|
| 4 | JLL Smart Mini Elliptical – Low-Impact Cardio, Quiet Magnetic Resistance (8 Levels), Compact for Home or Office, LCD Display, Bluetooth SunnyFit App Compatible |
|
| 5 | Under Desk Elliptical Machine, Electric Seated Pedal Exerciser, Min Leg Exerciser with Remoter, 12 Level Speeds, Forward & Reverse Direction, Manual & Auto Mode for Home Office |
|
| 6 | Under Desk Elliptical Machine, Electric Elliptical Leg Exerciser for Seniors Fully Assembled, Quiet & Portable Electric Seated Pedal Exerciser with Remote Control & 12 Adjustable Speeds |
|
| 7 | Under Desk Elliptical Machine, Electric Elliptical as Seen on TV for Seniors Adults with 15 Adjustable Speed, Quiet & Portable Electric Seated Pedal Exerciser with Remote Control & 5 Auto Mode |
|
| 8 | Sunny Health & Fitness Cardio Climber Stepping Elliptical Exercise Machine for Home with 8 Levels of Magnetic Resistance, Performance Monitor, Full Body Workout |
|
| 9 | Elliptical Exercise Machine for Apartments and Homes,8 Levels of Magnetic Resistance,15.5-inch Stride Elliptical Machine, and Supports Users up to 400 pounds Elliptical Training Machines; |
|
| 10 | Under Desk Elliptical Machine, Electric Ellipse Leg Exerciser for Senior, Quiet and Compact Electric Seated Pedal Exerciser for Home with Display Monitor, Remote Control and 12 Adjustable Speeds |
|
If your console isn’t powering on or displaying data after assembly, the first step is to recheck all wire connections. Ensure each plug is fully seated and that no pins are bent or damaged. Sometimes, a loose connection can prevent the console from receiving power or data signals. Verify that the power adapter is correctly plugged into both the elliptical and a working electrical outlet. If the issue persists, consult your elliptical’s user manual for specific troubleshooting steps or contact customer support.
Securing and Organizing Wires for Longevity
Once all connections are made, it’s important to secure and organize the wires to prevent damage and ensure longevity. Many ellipticals come with cable clips or ties designed to hold the wires snugly against the frame or within the upright post. This prevents wires from being pinched, snagged, or pulled during use. Proper wire management also contributes to a cleaner, more aesthetically pleasing appearance of your assembled machine. Always leave a small amount of slack in the wires to accommodate any slight movement during operation, but not so much that they can interfere with moving parts.
